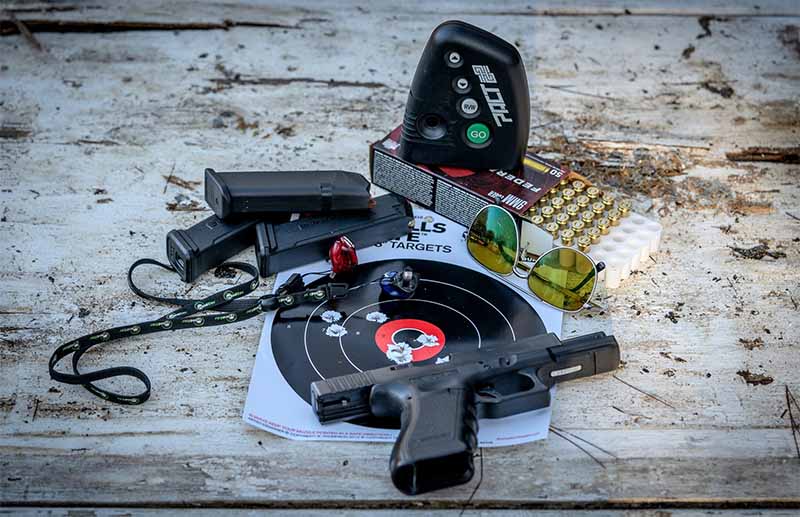


There are many shooting drills you can use to train and evaluate for concealed carry. This is due to a number of reasons. Most drills are designed to focus on a single skill or a few specific ones related to shooting a handgun defensively. You can then focus on the individual skills to evaluate your performance, and identify specific performance elements that require improvement. If you don’t take defensive handgun training seriously, you will have a difficult time identifying areas that need improvement. There are many drills you can use to target a specific skill. You can make your training sessions more fun by using multiple drills. You will also be able to broaden your skill set. With each drill, the handgun is in the holster. You should always take advantage of the opportunity to practice your handgun draw or presentation. As we all know, the goal of shooting is to hit. You’ll also need some self-adhesive halo targets from Thompson Target (item #7042) and some 8-inch halo targets from Thompson Target (item #4610). You can use 8-inch and 4-inch circles. However, more information will be provided in the scoring section for each drill. A shot timer is a great tool to measure accuracy and performance. You can make your own target stands with a little creativity, but you’ll need a shot-timer. PACT’s Club Timer III is incredibly affordable at $130. The EDC DrillWhile the EDC Drill doesn’t require much skill, it does incorporate movement which is essential for defensive handgun training. Moving targets are more difficult to hit than stationary ones. If you’re under attack, it’s a good idea to have your attacker change their route to reach you. The EDC drill involves engaging the target, then moving and engaging it again if necessary. This drill allows you to focus on movement and reestablishing your shooting foundation rather than pinpoint accuracy. You should use the holster that you carry your EDC handgun. It would also be ideal to draw from concealment because if ever you need to use your concealed carry gun, you will likely be drawing from cover. You’ll need a Thompson Target #4610 halo target, as well as your shot timer. Drill Conduct: Place the target stand at a distance of 5 yards, and place one target onto the cardboard backing. Step back 5 yards and paint an “X” on the ground. Then, take two steps right or left, and paint another “X” on the ground. Set your shot timer on the delay start mode. Stand on the right or left X and, on the signal, draw two shots at the targets. Then, move left or right to the other X and fire two more shots. You can also use two target stands with two targets, and shoot at one target from each position. As your skill improves, you can reduce target size by keeping all of your shots within one of the smaller scoring circles. Once you are able to do this drill in the par time, and keep all of your shots within the No. If you can do this drill within the par time and keep all your shots inside the No. No. You can learn your shot cadence by using the Cadence Drill. This drill will help you adjust your shot time based on distance, target size, and the number of shots you are firing. This drill will help you determine your shot cadence for different distances or different sized targets. This is especially important if the distance between you and your attacker changes, or if there are multiple attackers at varying distances. If possible, use a holster that you already carry your EDC handgun. It’s best to draw from concealment if you feel comfortable. A shot timer will be very useful for defensive handgun exercises. You’ll need a target stand and two Thompson Target #7042 adhesive Halo targets, as well as one Thompson Target #4610 halo target. Pact Club Timer III costs just a little more than $100. Drill Conduct: Place the target stand at a distance of 5 yards, and place two 4-inch and one 8-inch halo targets on a cardboard backing. Set your shot timer on the delay start mode and then step back 5 yards. On the signal, draw your gun and fire two shots into the large target. Then, fire two more shots into the large target. Finally, fire two more shots at the smaller target. As you improve your skills, you can add a concealment shirt and reduce the size of the targets by keeping all your shots within one of the smaller scoring ring. The smaller target simulates a larger target at 10 yards as opposed to five yards. Once you can do this drill within the par time and keep all your shots inside the No. You’ve found the right balance between speed and precision when you have 7 scoring rings on each target. Use the shot-timer review feature to get your split times, the time between shots. Compare the splits of the larger target and the smaller targets. The Long RangerDrill is similar to the Cadence Drill in that you will be firing multiple shots from different distances. The only difference is that there will be no transitions between targets. The Long Ranger drill aims to improve your ability to engage one target with multiple shots from close range and from a distance. As always, you should use your everyday carry weapon and concealment holster with a cover garment. You could also use four target stands with four targets. You won’t need to move your single target or walk back 5 yards at the end of each segment. You’ll need your shot-timer as usual. Keep a record of all your defensive handgun training. Draw and fire two rounds at the start signal. Step back 5 yards, or switch to the target at 15 yards. At the signal, fire two shots from the holster at the 15-yard mark. You will repeat this exercise at 20 yards, and then at 25 yards. If possible, use a holster similar to the one you would use to carry your defensive pistol. The shot timer will show you how long it took to fire your first shot for each engagement. The shot timer will also tell you how long it took to fire the first shot for each segment. These split times are crucial for training, as you want to make them faster. Add them all together and the total time should not be more than 16 seconds. If you used a different target for each distance, then you should have two hits per target. If you use a different target to represent each distance, then you should have at least two hits per target. If you can complete this drill in the time allowed and keep your shots within the No. If you can do this drill within the par time and keep all your shots inside the No. You’ve found a good balance between speed, accuracy and speed. This will be hard to do at the 20- and 25-yard distances.SummaryRemember: With each drill, you’re targeting a specific application of the defensive handgun. Use the review feature of your shot timer to check your draw times (the amount of time between the start signal and the first shot), as well as your split times (the amount time between each shot). You can use these to evaluate your performance, and discover which aspects of the drill you need to work on more. This will help you prepare for your next range session and will show that you are serious about training with a handgun in self-defense, should you need to use it. More Defensive Handgun Exercises:NEXT: Download Your Free Storm Tactical Printing Target Pack62 Printable MOA targets with DOT drills – Rifle Range In YARDSThis impressive pack from our friends at Storm Tactical includes62 printable targets for rifle and handgun ranges. The target grids and bullseyes are in MOA. Subscribe to the Gun Digest newsletter and we will send you your print-at home target pack immediately. Enter your email below.


Varmint Activities with AR-Platform Firearms in Saturday shows
Varmint Adventures with AR-Platform Rifles on April 19, 2025Saturday Movies: Varmint Season in some parts of the nation With flower quickly transitioning to summer. A semi-auto d weapons is a