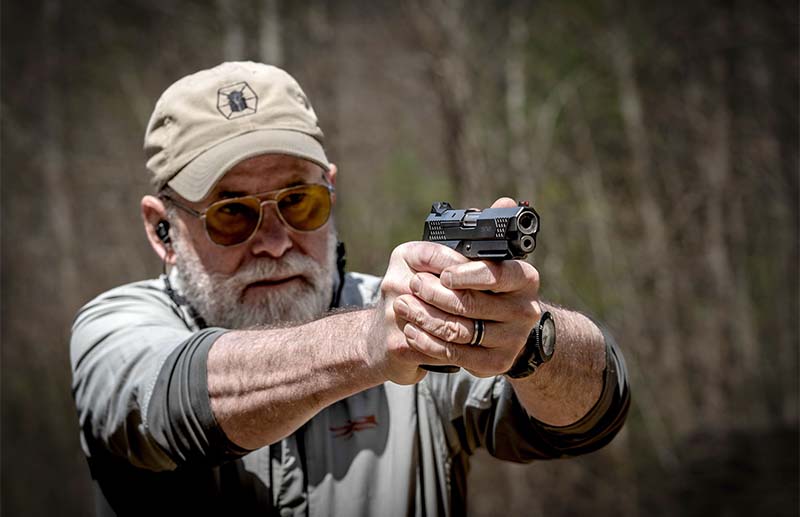


I started working in law enforcement at the beginning of the 1990s. The marketplace and training were the key factors in competition pistol shooting at that time. The Weaver stance, developed in 1959 by Jack Weaver in Lancaster, California, was designed to ensure quick and accurate shot placement. Jeff Cooper codified it and it resembles the fighting stance used by boxers or mixed martial artists. The isosceles shot stance allows you deliver force quickly while maintaining balance and ability to move. Rob Leatham’s version of the isosceles shot stance gained a lot attention after he used it to win several big competitions. Max Michel, the world’s most successful speed shooter, said that the isosceles shooting stance allowed the competitive shooter a full range motion in a 360-degree arc. This allowed them to easily switch between multiple targets. I’ve been taught both by people who would be considered masters. I learned to use the Weaver stance from Gunsite Academy and the isosceles – or at least Michel’s version of it – from Michel. Both are very effective, and they will give you a solid foundation to build on if you’re learning to shoot a pistol. Standing with your body parallel to the target, you should be able to see it clearly. Feet should be at shoulder width, and some people suggest that your strong side foot is slightly behind your other foot by a half-step. Your shoulders should be above your knees and your knees over your toes. You are essentially leaning forward. You hold your head up straight and bring your handgun to eye level when you draw it. You don’t drop your head. The main difference between the Weaver and other stances is that the elbow of your weak arm or support arm is bent at a 45-degree arc, while the elbow of your shooting arm is either straight or very slightly bent. The Weaver stance requires that you use your shooting arm to push the pistol forward and your support arm to apply pressure at the rear. Do not tuck your pistol between your arms, or lean to one side. Your body should also be squared towards the target. You can place your feet shoulder width apart, or slightly forward. The main difference between the isosceles and the weaver stances is that your elbows are locked or very slightly bent. Both arms should be extended. The Weaver and the isosceles stances are similar in that you use your shooting arm to push the pistol forward and your support arm to apply pressure at the rear. It is for this reason that a stance is usually the second thing you learn after grip. You can focus more on other aspects of shooting, such as grip, sight alignment, and trigger control, if you have a solid foundation. This is because you are not trying to learn/do everything at once while maintaining balance. Balance is key when it comes to choosing a shooting stance. With your head upright, you can better monitor your situation and react. You can watch an NFL quarterback to see for yourself. When they’re in the pocket, where they are under duress, and must maintain awareness of attackers/pass rushers, they keep their heads erect. This is an exaggerated version of the isosceles position. Notice how the shooter’s head is sucked–turtled–down between his arms.Often, you’ll see those shooting the Weaver stance cock their head to the side and rest it on their shooting arm. You’ll also see people shooting from the isosceles position duck their heads like a turtle in between their shooting arms. Both approaches are incorrect. Shooters will also excessively shave their body when using the Weaver stance. They’ll spread their feet too far apart, or lean forward too much, when using the isosceles position. These bad stances might not seem serious when you are learning to shoot. The shooter’s body is upright, but his head is not. He will probably be able make a good shot, but he will struggle to control the recoil, and make fast and precise follow-up shots. It doesn’t matter which stance you choose, just learn it well enough to make it a reflexive reaction when you decide to shoot. You will eventually use a combination of both shooting positions to solve more complex shooting situations, such as during tactical training or competition. Or, worse, in a situation when you need to shoot to save yourself. After you’ve mastered the art of shooting a handgun you’ll only care about your stance if it allows you to control the weapon and keep your balance during a fight. The target grids and bullseyes are measured in MOA. Subscribe to the Gun Digest newsletter and we will send you your print-at home target pack immediately. Enter your email below.


How Surface Length of a Bullet May Affect Load Force
How Surface Length of Bullet Bearings May Affect Load Pressure on March 18, 2025Photo 1: Three 7mm bullets with different shapes and sizes that are nearly equal in weight (