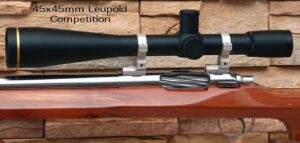


Today’s Sunday GunDay story is about the Remington 700, the iconic American bolt-action rifle. After a brief history of Rem 700 rifles, we give an inside look at Rem 700 rifles through a series cutaway animations. Next, we will explain how gunsmiths can improve a Remington 700 action using “blueprinting”. Remington 700 History and Origins After World War II, Remington Arms engineer Mike Walker developed lower-cost alternatives for the Model 30. This resulted in Model 721. These receivers were made from cylindrical bar stock and could be turned on a lathe. This greatly reduced the production cost. Walker continued to develop the basic 721 action and produced the Model 722, Model 725 and, finally, the Model 700 in 1962. Walker wanted to improve the accuracy of the rifles by using tight tolerances in the chamber bore and bore, a short leade and a fast lock time. The Remington 700 action, like the 721, was made for mass production. Remington produced two versions of the Model 700, the ADL (long-action) and the BDL (short-action). Remington made improvements to the rifle in 1969. They added a longer rear bolt shroud and a jeweled bolt. Four years later, Remington began producing left-handed Rem 700s to compete with the Savage Model 110 left-bolt rifle. Other Rem 700 models include the titanium receiver 700ti and 700 SPS, which replaced the ADL in 2005, and the CDL model. The Model 700 was not only a hunting rifle but also served as the basis for police and military sniper rifles. It was first ordered by the U.S. Marine Corps in 1966 with the M40 rifle. In 1986, the U.S. Army adopted M24 Sniper Weapon System.
Both short- and long-action Remington 700s are available. This photo is taken from the Big ED YouTube channel comparing the different action lengths. The Remington 700 bolt action is manually operated and has two forward dual-opposed, bolt lugs. The bolt face is recessed and fully covers the base of cartridge. The extractor is a C clip that is located within the bolt face. The coil spring actuates the ejector, which is a plunger that sits on the bolt face. The bolt is made of three pieces, which are brazed together (head and body) The receiver is made from round cross-sectional steel. Chassis Systems Remington 700s
Many companies have developed after-market chassis systems in response to the popularity of Remington 700 series rifles and the availability Rem 700 barreled action by themselves. This GunMan YouTube Video examines five modern chassis systems for Remington 700 barreled action rifles. Modular chassis systems are very popular among PRS/NRL competitors. Rem 700 Cutaway Video – Components + Operation 3D computer graphics make it possible. Modern software can provide detailed “cutaway side-views” (see below) as well as 3D views that rotate 360deg. As you can see, the software can also provide Xray-type views of the gun’s internals. Computer animations can also show the entire firing process, from trigger pull to chambering the next round. READERS — Take the time to view the video! This Rem 700 animation is truly amazing! This video is a must-see for any bolt-action shooter. Remington Arms has been manufacturing the Model 700 series bolt-action rifles since 1962. They all share the same centerfire bolt action. They come with an internal magazine, depending on the caliber. Some have a floor plate for quick-unloading. Others are blind (no floor-plate). The Model 700 is a modification of the Remington 721 series of rifles. It was introduced in 1948. The Remington 700 is a bolt action that can be manually operated with forward, dual opposed-lugs. It has “Cock On Opening”, which means that the bolt rotates upwardly when the rifle is opened, cocking the firing pin. Cam mechanism moves the firing pin’s firing pin’s cocking part backwards. The cartridge’s base is enclosed by the bolt face, which is fully recessed. The C-clip that is located within the bolt face houses the extractor. The coil spring actuates the ejector, which is a plunger that sits on the bolt face. The bolt is made of three pieces, which are brazed together (head and body). The bolt handle. The receiver is made from round cross-sectional steel. Blueprinting Rem 700 Action – Making a Good Action More Effective You may have heard the term “blueprinting an act”, but are you familiar with what it actually means? What operations are performed to an action during blueprinting? Bill Marr, a gunsmith from RifleShooter.com, has written a helpful article that will help you understand the blueprinting process for Rem 700. This article demonstrates how manual tools can be used to complete the tasks. Bill, who owns 782 Custom Gunworks Ltd. can perform many of these operations using modern automated machinery. Bill has even written a follow up article on Truing a Rem700 receiver with a Lathe. Bill explains that blue-printing, also known as truing a rifle, ensures that the receiver face, threads and bolt lugs are straight to the centerline of the receiver. In Bill’s informative article, Bill demonstrates how he blueprints a Remington 700 receiver with a.308 Win bolt. He walks through the steps of Action Disassembly.
Ream Minor Diameter Receiver Threads
Square the Receiver Lugs
Square the Face of the Recipient
Lap the Bolt Lugs
Square the Bolt Face Bill used a variety Brownells tools to complete the blueprinting job. These included: Remington 700 Armorer’s Kit; Manson Reccurizing Kit; Bolt Lapping Tool; Bolt Face Truing tool; Manson Receiver Ring Facing Cut; Multi-Vise Jaw Pads; Silicone Cartbide Abrasive; Do-Drill Cutting oil. 1. Truing the Receiver’s Face Using the receiver facing instrument, the front of your receiver can be verified. The tool is placed on top of the tap and rotated by hand. To lubricate the tool, we used Do Drill. 2. Lapping the Lugs. The bolt lapping tool is inserted into the front of each bolt and applies rearward pressure to the bolt face. A small amount of lapping compound should be applied to the front of each lug. The bolt handle can then be raised and lowered several times. It is important that we don’t get any lapping compound onto any other surfaces. 3. Truing the Bolt Face This Rem 700 bolt face is now perfectly square to the action after the truing operation. READ FULL Action Blueprinting Article HERE >> IMPORTANT: Rifleshooter.com states that this article highlights our project and is provided for information purposes only. This article is intended to give an overview of the process, but it should not be attempted without the supervision and guidance of an experienced gunsmith. If you are interested in a Blueprinted Remington 700 action but don’t have a good gunsmith near you (or don’t want to wait for many weeks), Pacific Tool & Gauge can help you order one starting at $637.99 (see below).